Connecting Your Smart Halter to WiFi

One of the most important steps to get your smart halter up and running is to connect it to your barn's WiFi network so it can communicate with the NIGHTWATCH App and send you alerts! Here is a step-by-step guide to doing just that.
Before you begin, be sure to have the password available for the WiFi network you're preparing to connect to, and that you are in range (you can check by seeing if the network shows up on your smart phone in the list of available WiFi networks!)
Step 1
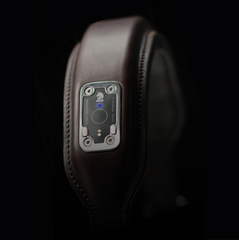
Begin with your smart halter powered off - the LED should remain dark. If not, press and hold the button on the ID tag ~3 seconds until the LED goes dark to power off.
From off, place the halter into broadcast mode by pressing and holding the button on the ID tag for ~10 seconds. The LED will glow white - continue holding until it changes to blue, then release.
Step 2
Once in broadcast mode, wait a minute or two. Your smart halter will begin broadcasting a network that you can see from your smartphone or computer's WiFi settings with the same name as your serial number (found on the ID tag of the halter, PA-0000xxx). Select this network and enter the password nightwatch (all lowercase) to pair your device to the halter.
Note: you may receive a notice that this network isn't connected to the internet - that's okay, you want to connect anyway.

Step 3
Once connected to your smart halter's broadcasted network (aka paired to your smart halter), go to your browser (such as Safari or Chrome) on the same smartphone or computer, and enter connect.smarthalter.com or the IP address 192.168.44.1 in the address bar to access WiFi Setup options.


Note: This page will only load if you are paired on the same device to your smart halter. If the page will not load, please ensure your smart phone did not re-connect to your normal WiFi network by checking your WiFi settings.
Step 4
From the WiFi Setup options, select your desired network from the dropdown list and enter the password to connect to your WiFi network. This gives your smart halter the network name and password to allow it to connect going forward!

Step 5
From here, you will either see an error, or you will see details of your successful connection including the network name and signal strength.
Once you have successfully connected, power your smart halter off and back on normally. You should not see the blue light.
That's it! You've connected your smart halter to your barn WiFi. You only need to enter broadcast mode (blue light) when connecting to a new WiFi network for the first time, or if your network name and password changes. Your smart halter can store multiple WiFi network passwords if needed, and will automatically join the known networks when in range.
Within 5 minutes of connecting and powering your smart halter back on in normal operating mode, you should be able to see the details of the WiFi connection in your app. Tap and drag the screen down to force refresh if needed.
Evaluating Your WiFi Coverage
Do you know if your barn WiFi reaches your horse's stall or paddock? A simple way to find out would be to walk around the barn and areas you'll be utilizing your smart halter to see what the WiFi strength looks like in your WiFi settings and make sure the network name shows up as an option to connect to. While your horse is wearing their smart halter, you should receive an update to the app every 5 minutes, and you can see the signal strength from the last check-in by tapping on the WIFi symbol on your horse's profile.
Need additional WiFi coverage? Check out this blog post for some ideas on how to amplify or extend the WiFi coverage in your barn.